Using GIT for revision control is a great way to manage your website's code. It allows a team of developers to commit code, and if you need to go back through the history of a file, it is very easy to do so. It can sometimes be a challenge to get started with GIT when using a shared hosting plan, especially if the host doesn't already have GIT installed for you. For this article, I am going to describe how to use it on a small plan from A Small Orange (http://asmallorange.com,) and fortunately, GIT is already included.
What you'll need
To get started, you will need SSH access into your account. For most cPanel-based accounts, there will be an SSH Access link in the Security section. From here, you will need to click 'Manage SSH Keys' -> 'Import Key.' You will then be able to give the key a unique name (so you can identify keys from different computers/users) and paste the contents of the key into the appropriate field. At the minimum, you should have a public key, but you may choose to use a private key and/or passphrase for more security. For help with generating your SSH key (if you don't already have one,) I recommend this GitHub article. Once you have added the key, you will need to authorize it, so click on the 'Manage' link next to the appropriate key, and then click the 'Authorize' button.
In order to SSH into your account, once the key has been added and authorized, open a terminal and enter ssh user@domain.com, where 'user' is the name of the account (usually the first portion of your domain name) provided from the host, and 'domain.com' is your domain name. This should log you into your hosting account. To verify whether you have GIT installed, simply type git and press enter (if it is installed, it should print out the proper usage of the command.) Since it should be available by default on A Small Orange, we will assume it is already installed. If it isn't, you may need to file a support ticket.
If you are doing team-based development (and even if your team is just one person,) I would recommend an online repository for your upstream account. GitHub and Bitbucket are both awesome, and Bitbucket is free for small (< 5 member) teams.
Environments
Every good Drupal developer should be familiar with Dev, Staging, and Production environments. Dev is where you test your code to make sure it won't break anything, Staging is where content is added (so users won't see a site being built before their eyes,) and Production is the live-to-the-world site. In theory, you could get by with just two environments, especially once the site is live, but it never hurts to have extra test cases before pushing code live.
High-end hosts, such as Acquia and Pantheon, have a pretty slick online interface for moving your code from Dev to Staging to Production. There is no way you can bypass Dev, so you making sure that your code is identical in all environments, which is a very good thing. Unfortunately, we won't have that functionality with the setup we are using on ASO, but we can still have our multiple environments.
Create the Subdomains
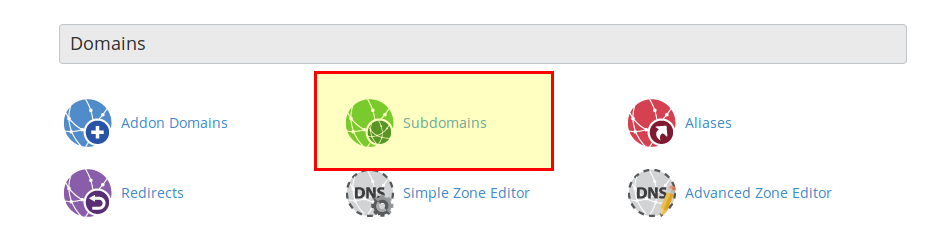
First, you will need to create the URLs for the Dev and Staging environments. These will be something along the lines of dev.lowgravitystudios.com and staging.lowgravitystudios.com. You can do this through cPanel by going to Subdomains
Then enter the name of the subdomain and select the domain (if applicable.) By default, a document root will be generated, which you may edit if you want (I'd just leave it as-is.)
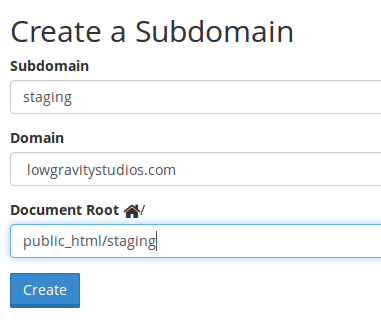
Once you have created the subdomains, you should be able to go them (e.g. staging.lowgravitystudios.com) and you will get an empty directory listing.
Configure GIT Repositories
Configuring your local and origin/upstream repositories will be in another article. For the purposes of this article, I will assume you already have your code being stored in a repository on GitHub or Bitbucket, so you are now looking to push it to your server.
Remember where we setup SSH access to the server? If you are not already logged in, do so now. Issue the following commands:
ssh user@domain.com
cd ~/
mkdir git
cd git
mkdir dev.git
cd dev.git
git init --bare
Here's what the above code is doing:
- SSH into the server
- Change to your accounts home directory. You will probably already be there by default, but this makes sure of it.
- Create a git directory to hold all of your repositories (for housekeeping.)
- Create a directory for the repository.
- Initialize the repository.
You will need to repeat these steps for the staging and production repositories as well (staging.git and prod.git.)
Next we will need to edit some deploy hooks. What this will do is, when we push code to, say, dev, it will instantly do a git check-out of the code and place it in our Dev subdomain. This way, once we push it, it is ready to use.
On the server:
cd ~/git/dev.git
cd hooks
nano post-receive
Now enter the following command into the editor:
#!/bin/sh
GIT_WORK_TREE=/path/to/your/dev/document/root git checkout -f master
Where the path for GIT_WORK_TREE should be the path to your Dev subdomain (~/public_html/dev, if you've been following along.) Save the file (CTRL+X, Y.) Finally, you will need to set the permissions for this file so it can be executed:
chmod a+x post-receive
Repeat for the Staging and Production environments:
cd ~/git/staging.git
cd hooks
nano post-receive
#!/bin/sh
GIT_WORK_TREE=/path/to/your/staging/document/root git checkout -f master
and
cd ~/git/prod.git
cd hooks
nano post-receive
#!/bin/sh
GIT_WORK_TREE=/path/to/your/prod/document/root git checkout -f master
Note that your production environment doesn't have a subdomain, so you will be checking it out directly to ~/public_html/. Of course, if your production environment is a subdomain, you will be using that. Don't forget to set the permissions on each of the post-receive files.
Add the Remote Repositories to Your Local GIT
Now that the remote repositories have been created, we can add them to the local GIT repository so we can push code to them. If you are using a git client, you can add the repository via its settings, but it is pretty simple to add via the command line as well:
Note that you will need to be in the repository to issue these commands.
git remote add dev username@domain.com/home/username/git/dev.git
git remote add staging username@domain.com/home/username/git/dev.git
git remote add production username@domain.com/home/username/git/prod.git
Just make sure to note the paths to the repositories.